And by barn ass, I mean the sickly sweet residue that clings to trodden hay, mingled with horse pee and the faint odor of stale earth. This, I suppose, is the smell of brewing.
Today Tom and I started our first batch of home-brewed beer. It is composed of various pre-measured, hermetically sealed packets of ingredients that have been carefully packaged so that not even the village idiot could screw up the brewing process. This is a good thing, because we are heading into this venture with little information beyond the basic knowledge of how alcohol is made (which I learned from an episode of Dirty Jobs; yes, my high school science education was shit) and a strong surety that we love beer. Particularly the complicated Belgiany type that is served in a goblet by hipster bartenders who hold masters degrees in philosophy.
Yet shockingly enough, when we told the slightly nerdy gentleman working at Hop City that we didn't care for the drink known as "pale ale" for which the equipment starter kit contained ingredients, we were met with a restrained suggestion that we begin with it nonetheless and save our beloved tripels and quadruples for later.
And so we begin.
Brewing beer is purported to be an easy process: heat water + malt, add hops, add yeast, ferment. With, you know, some other steps. Yet every book and Web site I've visited, and even the 1 page instruction print-out included in our equipment starter kit, contains oodles of ancillary information and details that serve mostly to confuse me. It seems that everyone starts out with the goal of making things simple, but ultimately can't help but keep adding things. I mean, a hops chart would be nice. Oh, and an appendix with the origin of malt grains! And who doesn't want to hear about the history of prohibition and how it set back the development of microbreweries in America?
Me. That's who.
I just want the most simple, straightforward information. And pictures too, because who the hell knows what a hydrometer looks like? I'd never even heard of one before starting this adventure (see earlier parenthetical concerning my high school science education).
And so Tom and I are going to photograph the crap out of every step, and toss in individual pictures of each piece of equipment too. Except for the fermenting bucket. It looks like a bucket. If you can't Google a picture of a bucket, you are probably too stupid to talk. And yes, I'm aware that I'm calling you stupid from the position of not knowing what a hydrometer is.
Day 1: What We Used
Tom and I got started by first glancing through The Complete Joy of Home Brewing, which was helpful. Then we went to Hop City in Midtown and picked up a starter kit, which included most of the equipment we would need and the ingredients for said starter beer, which is a pale ale akin to Sierra Nevada. Hence, our first experience with brewing beer is based solely on the techniques and ingredients provided by this specific starter kit.

Equipment
Ingredients

Equipment
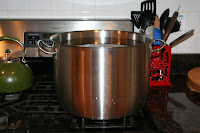
- 20 quart (5 gallon) stainless steel cooking pot (not included in kit)
- Large spoon
- Mesh filter bag (for steeping malt grains)
- Iodine solution (for sanitizing)
- Plastic 5 gallon bucket w/ lid (for first stage of fermenting)
- Airlock w/ cap and gasket (goes in hole on top of bucket to let fumes escape but keep outside air out)
- Thermometer (we used a floating one and an instant-read)
- Glass liquid measuring cup (for blooming the yeast) (not included in kit)
- Turkey Baster (not included in kit)
- Hydrometer and test cylinder (measures gravity/density of liquid to tell you what the alcohol content is)
Ingredients
- 5 gallons + 1 gallon of bottled spring water
- 1 lb. Caramel malt (cracked whole malt grain for steeping)
- 6 lb. Dried malt extract (powdered malt for dissolving)
- 2 oz. Cascade pellet hops (divided into 1 oz., 1/4 oz., and 3/4 oz.)
- 11 g. Brewing yeast
Day 1: Brewing the Wort and First Stage Fermenting
The entire first day process took us about 5 hours from start to finish. I imagine that we'll shave off about a half an hour in the future due to less fumbling, but most of the time came from repeatedly boiling 5 gallons of water.
Sanitizing the Equipment
Brewing the Wort
1. Add 5 gallons of spring water to 20 quart pot and heat on high, uncovered.
2. Pour cracked whole malt grains into mesh steeping bag and submerge in the water. To keep the bag from touching the bottom of the pan, we Macgyvered the bag to hang from the microwave handle. I know. We're awesome.

3. After 30 minutes, remove the mesh bag of grains. We did not squeeze it, but let most of the liquid drip back into the pot. At this point the liquid is becoming the "wort."
4. When the wort comes to a boil, turn off the heat and add the dried malt extract, stirring to dissolve. It gets extremely sticky and clumpy and took us about 15 minutes to totally dissolve.


5. Return the wort to a boil and add hops according to your special hop schedule:

6. Cool the wort off by sticking the pot in the sink and filling the sink up with ice water. When the ice melts and the water is warm, drain it and repeat. Do this until the water stops warming up and the wort approaches 80° F. It took us 3 times.


7. While you're cooling your wort, you need to rehydrate the brewing yeast:

8. Pour the wort from the pot to the fermenting bucket. Add more spring water to bring the volume up to 5 gallons, and then check the temperature to ensure that it's below 80° F. If it isn't, wait around.

Note: Do not put your baby in the fermenting bucket.
9. At this point you want to take a sample of the wort to record its gravity:

10. Add the yeast slurry to the fermenting bucket and stir vigorously to aerate it.


11. Cover the fermenting bucket with the lid.
12. Pour some spring water into the air lock and stick its bottom into the rubber gasket. Then, stick the gasket firmly into the hole on the lid. Cover the top of the air lock with the cap.

That's it. Now you stick the bucket somewhere cool (60°- 65° F) and dark for 4-14 days until the foam produced from fermentation peaks and settles. The next step is to transfer the beer into another vessel for second stage fermenting, which you will do by siphoning it off, so make sure you place the bucket in raised position so that you can put the other vessel below it.
 In the mean time, find some activity to occupy your time.

Sanitizing the Equipment
- Start by making sure your pot, spoon, thermometer, and mesh bag are cleanly washed.
- Dilute 1/2 oz. of iodine in 2.5 gallons of regular water in your plastic fermenting bucket.
- Sanitize the equipment that will come into contact with the wort post-boiling:
- Inside of plastic fermenting bucket.
- Lid for fermenting bucket.
- Turkey baster
- Air lock, cap, and rubber gasket.
Brewing the Wort
1. Add 5 gallons of spring water to 20 quart pot and heat on high, uncovered.

2. Pour cracked whole malt grains into mesh steeping bag and submerge in the water. To keep the bag from touching the bottom of the pan, we Macgyvered the bag to hang from the microwave handle. I know. We're awesome.

3. After 30 minutes, remove the mesh bag of grains. We did not squeeze it, but let most of the liquid drip back into the pot. At this point the liquid is becoming the "wort."
4. When the wort comes to a boil, turn off the heat and add the dried malt extract, stirring to dissolve. It gets extremely sticky and clumpy and took us about 15 minutes to totally dissolve.


5. Return the wort to a boil and add hops according to your special hop schedule:
- Add 1 oz. of hop pellets; stir to dissolve.
- Boil uncovered for 45 minutes.
- Add 1/4 oz. of hop pellets; stir to dissolve.
- Boil uncovered for 15 minutes.
- Remove from heat and add 3/4 oz. of hop pellets; stir to dissolve.

6. Cool the wort off by sticking the pot in the sink and filling the sink up with ice water. When the ice melts and the water is warm, drain it and repeat. Do this until the water stops warming up and the wort approaches 80° F. It took us 3 times.


7. While you're cooling your wort, you need to rehydrate the brewing yeast:
- Microwave 4 oz. of spring water in a glass measuring cup until it reaches 86°- 92° F.
- Pour in the brewing yeast but don't stir; let it sit for 15 minutes.
- Stir the yeast to suspend it in the slurry.

8. Pour the wort from the pot to the fermenting bucket. Add more spring water to bring the volume up to 5 gallons, and then check the temperature to ensure that it's below 80° F. If it isn't, wait around.

Note: Do not put your baby in the fermenting bucket.
9. At this point you want to take a sample of the wort to record its gravity:
- Use the turkey baster to extract some of the wort and deposit it into the test cylinder.
- Stick the hydrometer in and write down the number in the "Specific Gravity" column.
- Use your thermometer to note the temperature of the wort sample. You can use this to adjust the gravity from the baseline.
- Discard the sample.

10. Add the yeast slurry to the fermenting bucket and stir vigorously to aerate it.


11. Cover the fermenting bucket with the lid.
12. Pour some spring water into the air lock and stick its bottom into the rubber gasket. Then, stick the gasket firmly into the hole on the lid. Cover the top of the air lock with the cap.

That's it. Now you stick the bucket somewhere cool (60°- 65° F) and dark for 4-14 days until the foam produced from fermentation peaks and settles. The next step is to transfer the beer into another vessel for second stage fermenting, which you will do by siphoning it off, so make sure you place the bucket in raised position so that you can put the other vessel below it.


Day 6: Siphoning the Beer for Second Stage Fermenting
So, after 5 days of bubbling away, the activity in the fermentation bucket has died down (i.e., CO2 is not constantly glugging out of the air lock as the yeast breaks down the sugars and the foam on top has settled) and it's time to transfer or "rack" the beer to a new vessel for secondary fermentation. To do this, you siphon the beer from the fermenting bucket to a plastic carboy.
Here's what we used for secondary fermentation:

Here's what we did:
1. Sanitize the carboy, stopper, racking cane, and tubing in an iodine solution and air dry.
2. Place the carboy hole-side-up on a level lower than the fermenting bucket (we put it on the floor beneath the table holding the bucket). We put a towel underneath it to catch any spillage.
3. Remove the lid from the fermenting bucket. The lid from our kit required the tab to be cut and pulled off with pliers.


4. Attach the short end of the racking cane to the plastic tubing; the other end of the racking cane has a little cap on it to keep yeast out. To make the tubing easier to attach, heat the end by holding it under hot tap water.
5. Prime the racking cane / tubing for siphoning by pouring spring water into the open end of the tubing until all the air is replaced. We just poured it into the tube over a sink; it wasn't hard. Hold the capped end of the racking cane upward to keep water from spilling out. When finished, place a finger over the open end of the tube to hold the water in.

6. Quickly place the capped end of the racking cane into the fermenting bucket and then stick the tubing into the bottom of the carboy. As you remove your finger from the end, the water, followed by beer, will siphon into the carboy. Use the tube clip to secure the tube to the lip of the bucket. Don't mess with the racking cane or you'll get yeast in your siphon.


7. When most of the beer is transferred and before you start to suck out the lake mud (illogically called a "cake") at the bottom of the bucket, pull up the racking cane to stop the siphon. Extract the tube from the carboy and insert the large rubber stopper and airlock into the hole.


The beer is now ready to sit and continue fermenting for another 1-2 weeks. Then, we'll start taking hydrometer readings; when they remain stable over a few days, the beer will be ready for bottling.

Here's what we used for secondary fermentation:
- 5 gallon plastic carboy
- Large rubber stopper (to fit the airlock into the carboy)
- Racking cane (fits into the tubing for siphoning)
- Plastic tubing (for siphoning beer from bucket to carboy)
- Tube clip (for securing the tube to the lip of the bucket)
- Spring water (for starting the siphon)

Here's what we did:
1. Sanitize the carboy, stopper, racking cane, and tubing in an iodine solution and air dry.
2. Place the carboy hole-side-up on a level lower than the fermenting bucket (we put it on the floor beneath the table holding the bucket). We put a towel underneath it to catch any spillage.
3. Remove the lid from the fermenting bucket. The lid from our kit required the tab to be cut and pulled off with pliers.


4. Attach the short end of the racking cane to the plastic tubing; the other end of the racking cane has a little cap on it to keep yeast out. To make the tubing easier to attach, heat the end by holding it under hot tap water.
5. Prime the racking cane / tubing for siphoning by pouring spring water into the open end of the tubing until all the air is replaced. We just poured it into the tube over a sink; it wasn't hard. Hold the capped end of the racking cane upward to keep water from spilling out. When finished, place a finger over the open end of the tube to hold the water in.

6. Quickly place the capped end of the racking cane into the fermenting bucket and then stick the tubing into the bottom of the carboy. As you remove your finger from the end, the water, followed by beer, will siphon into the carboy. Use the tube clip to secure the tube to the lip of the bucket. Don't mess with the racking cane or you'll get yeast in your siphon.


7. When most of the beer is transferred and before you start to suck out the lake mud (illogically called a "cake") at the bottom of the bucket, pull up the racking cane to stop the siphon. Extract the tube from the carboy and insert the large rubber stopper and airlock into the hole.


The beer is now ready to sit and continue fermenting for another 1-2 weeks. Then, we'll start taking hydrometer readings; when they remain stable over a few days, the beer will be ready for bottling.

Subscribe to:
Comments (Atom)