Sanitizing the Equipment
- Start by making sure your pot, spoon, thermometer, and mesh bag are cleanly washed.
- Dilute 1/2 oz. of iodine in 2.5 gallons of regular water in your plastic fermenting bucket.
- Sanitize the equipment that will come into contact with the wort post-boiling:
- Inside of plastic fermenting bucket.
- Lid for fermenting bucket.
- Turkey baster
- Air lock, cap, and rubber gasket.
Brewing the Wort
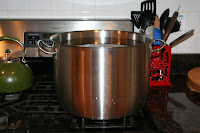
1. Add 5 gallons of spring water to 20 quart pot and heat on high, uncovered.
2. Pour cracked whole malt grains into mesh steeping bag and submerge in the water. To keep the bag from touching the bottom of the pan, we Macgyvered the bag to hang from the microwave handle. I know. We're awesome.
3. After 30 minutes, remove the mesh bag of grains. We did not squeeze it, but let most of the liquid drip back into the pot. At this point the liquid is becoming the "wort."
4. When the wort comes to a boil, turn off the heat and add the dried malt extract, stirring to dissolve. It gets extremely sticky and clumpy and took us about 15 minutes to totally dissolve.
5. Return the wort to a boil and add hops according to your special hop schedule:
- Add 1 oz. of hop pellets; stir to dissolve.
- Boil uncovered for 45 minutes.
- Add 1/4 oz. of hop pellets; stir to dissolve.
- Boil uncovered for 15 minutes.
- Remove from heat and add 3/4 oz. of hop pellets; stir to dissolve.
6. Cool the wort off by sticking the pot in the sink and filling the sink up with ice water. When the ice melts and the water is warm, drain it and repeat. Do this until the water stops warming up and the wort approaches 80° F. It took us 3 times.
7. While you're cooling your wort, you need to rehydrate the brewing yeast:
- Microwave 4 oz. of spring water in a glass measuring cup until it reaches 86°- 92° F.
- Pour in the brewing yeast but don't stir; let it sit for 15 minutes.
- Stir the yeast to suspend it in the slurry.
8. Pour the wort from the pot to the fermenting bucket. Add more spring water to bring the volume up to 5 gallons, and then check the temperature to ensure that it's below 80° F. If it isn't, wait around.
Note: Do not put your baby in the fermenting bucket.
9. At this point you want to take a sample of the wort to record its gravity:
- Use the turkey baster to extract some of the wort and deposit it into the test cylinder.
- Stick the hydrometer in and write down the number in the "Specific Gravity" column.
- Use your thermometer to note the temperature of the wort sample. You can use this to adjust the gravity from the baseline.
- Discard the sample.
10. Add the yeast slurry to the fermenting bucket and stir vigorously to aerate it.
11. Cover the fermenting bucket with the lid.
12. Pour some spring water into the air lock and stick its bottom into the rubber gasket. Then, stick the gasket firmly into the hole on the lid. Cover the top of the air lock with the cap.
That's it. Now you stick the bucket somewhere cool (60°- 65° F) and dark for 4-14 days until the foam produced from fermentation peaks and settles. The next step is to transfer the beer into another vessel for second stage fermenting, which you will do by siphoning it off, so make sure you place the bucket in raised position so that you can put the other vessel below it.
In the mean time, find some activity to occupy your time.


No comments:
Post a Comment